
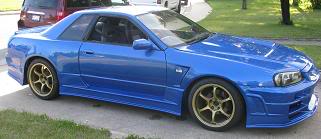
The previous project is on hold for a bit, this time around we are doing some work on a sweet sweet Nissan GTR. Yeeaaaaaa R34 front end swap, sexy.
So this is the plan:
- 8 point FIA style roll cage
- Remove a portion of the trunk floor and lower the fuel cell
- Clean up the interior and removing some heavy unnecessary junk. (map lights in a race car? psht)
- paint the interior and cage.
- and some odds and ends.
Forgot the camera the first day so pics start a day deep, not much exciting happened anyway.
Here come some pics :)
We started with removing what was left of the interior, to make room for the spiffy roll cage, mainly the dash and drivers seat. The dash will be modified and put back in after the cage is finished.
So after a lil' bit of work we had the dash out no problems :)
You can also see the factory side impact protection bar here. This is being removed, as well as its associated mounting brackets and being replaced with the dash bar from the roll cage. Heres how it looked just after the dash top was removed:

Then out comes all the rest of the comfort junk. AC stuff, heater core and blower motor, the controls for this were already removed, so its not like it was any use right now.

After all that was all cleared out it was time to give the sound deadening another hit of the spice weasel. This shows the left side all cleaned up, and the right side is awaiting some solvent and a once over with the grinder.

Here the drivers side foot well, awaiting cleaning.

and after:

There is a main seam going accross there, the seam sealer was pretty tough took a while to get rid of, it turned out nicely. We also decided to tidy up the water/meth injection and fuel pump wires to make things a little less hectic down the road.
Now to do some fun stuff, time to start bending some tube!
After taking some careful measurements and doing some maths, we start bending the main hoop. This will serve as the foundation of the cage, everything will be measured off of it, if it doesn't fit right, it will be very difficult to make the rest of the cage fit right.
So obviously we want to have a super tight fitment to maximise interior room and safety.
This was also our first oppertunity to try out our new home-made tubing bender, and were pleased to report it works perfectly.
Heres Tom inspecting the bends and watching the angle as it bends.

Needs a little more.

A couple minutes later, she's all finished. Now lets see how it fits!


Great success, couldn't ask for much more, it fits perfectly!
We also managed to get the two front lateral bars bent up, but it was getting late, lots more pictures when we get those fitted and start the other bits of the cage later this week.

No comments:
Post a Comment